How I Discovered the Magic of No-Dig Gardening
When I first started my garden at this house, I hired someone to till the soil. After the first season, I decided to maintain the garden myself and bought a tiller. But shortly thereafter, the tiller’s belt broke. Since I had been using straw as mulch everywhere, I didn’t really need the tiller, so it ended up as little more than a lawn ornament.
The following year, I wanted to expand my garden, but I wasn’t willing to pay for tilling again because the cost was pretty outrageous. So I started researching other options and stumbled upon the concept of no-dig gardening. The more I read, the more I realized that the best way to grow a garden is to NEVER till. By simply laying down plastic or other material to kill the turf, I could plant without tilling.
Determined to try this new approach, I got to work laying down black sheet mulch to kill off the weeds and turf. After allowing the sun to bake the plastic for a few months, it was time to plant. I simply cut holes in the sheet mulch, filled them with organic compost—just about half of a child’s sand bucket worth for each plant—and planted my seeds or seedlings directly into the compost.

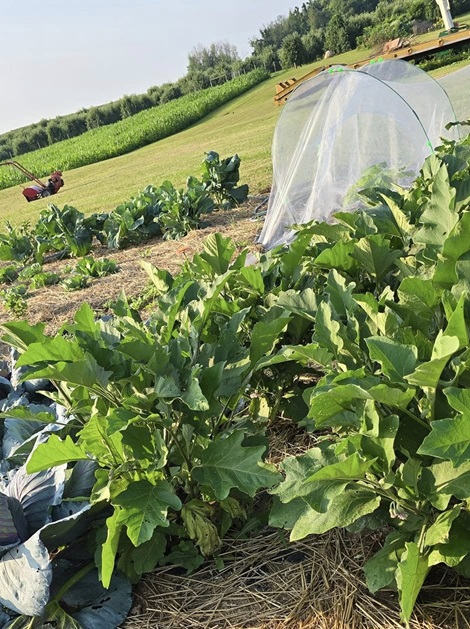
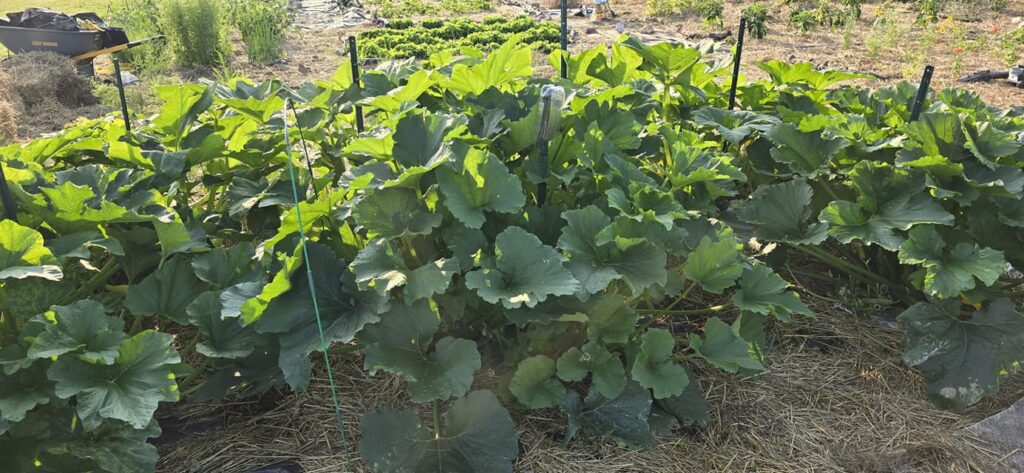
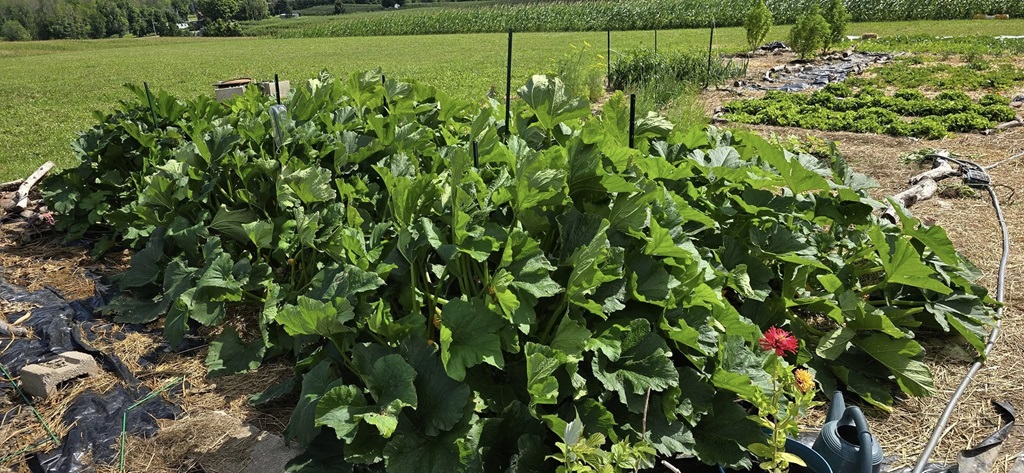
The results were beyond my expectations. My squash and eggplants thrived, producing the most abundant harvest I’d ever seen. The plants were lush, healthy, and incredibly productive. There was so much produce that I couldn’t possibly use it all—my neighbors and I ate our fill, and there was still plenty to go around so I dontated the rest to a food pantry!

This method was simple, cost-effective, and produced incredible results. I didn’t have to deal with the hassle of tilling, and the plants had everything they needed to grow strong. As you can see from the photos, the plants thrived from this no-dig approach.
If you’re thinking about starting a garden, I can’t recommend the no-dig approach enough. It’s easy to get started and provides amazing results with less work. Trust me—you’ll love it!

(In the heat of the summer, I covered the black sheeting with straw so that the plants weren’t stressed by the heat.)
Starting a Garden with Sheet Mulch
1. Choose and Prepare Your Location
- Pick a sunny spot: Most vegetables and flowers thrive with at least 6–8 hours of direct sunlight daily.
- Clear debris: Remove large rocks, sticks, and other debris from the area to create a smooth surface.
🌱
2. Lay Down Sheet Mulch or Other Material
I started with 5 mil black sheet mulch and I recommend 5 mil or better if you’re going to reuse it for years. Mine lasted four years in my garden and was still in excellent shape when I pulled it up to change over to the Ridgedale method.
- Type of Sheet Mulch: Whichever mulch you choose should be thick enough to block sunlight but thin enough to cut easily. I now use 4-6 inches of compost and woodchips in the fall
- Spread it out: Lay the plastic over the area where you plan to garden. Make sure the edges overlap if you’re using more than one sheet.
- Anchor the plastic: Secure the edges with bricks, stones, or landscaping staples to prevent it from blowing away.
If you’re in a windy area like I am, landscaping staples might not work. They don’t work for me unless I use them by the hundreds, so I just use rocks.
🌱
3. Kill the Weeds and Grass
- Wait: Leave the plastic in place for 4–6 weeks during warm weather, or a little longer in cool weather. The heat from the sun will smother and kill the weeds and grass beneath.
- It will take much less time in the heat of summer to kill the grass and weeds.
🌱
4. Prepare Planting Holes
- Cut holes: Use scissors or a utility knife to cut X-shaped slits or round holes in the plastic where you want to plant.
- Size of the holes: Make the holes large enough to fit the seedlings and a several cups of compost.
🌱
5. Add Compost or Soil
- Fill the holes: Add a generous amount of rich compost (e.g., organic compost) or high-quality soil into each planting hole. A small sand bucket’s worth per hole works well.
🌱
6. Plant Your Crops
- Choose your plants: This method works great for heat-loving crops like squash, eggplant, tomatoes, and peppers.
- Plant directly in the holes: Place the plants in the compost or soil you added, ensuring the roots are well-covered.
- This works well to start cool-weather crops but once the heat of the Summer is at full blast, covering the plastic with some type of mulch (I use straw) helps to keep them from baking under the plastic. Another alternative is to remove the plastic all together to prevent heat stress but then you’ll have to mulch or weed.
🌱
7. Water Properly
- Direct watering: Water each plant at the base to ensure the roots get adequate moisture. The black plastic will help retain soil moisture by reducing evaporation.
- Check regularly: While plastic reduces the need for frequent watering, monitor your plants, especially during hot weather.
🌱
8. Maintain the Garden
- Inspect the plastic: Check occasionally to make sure the plastic remains secure and weed growth isn’t occurring at the edges or holes
🌱
9. Enjoy the Harvest
Your plants should grow healthy and strong, thanks to the weed-free environment and the nutrients from the compost. Expect excellent yields!
🌱
Don’t forget to check out our fall to-do list to prepare your garden to be highly productive for next year!


